This week over at Teddy Bo top tips we have a tutorial for something a little festive and the teacher this week is ME!!!???!!!
Yep that's right we're scraping the bottom of the barrel but at least I did my tutorial with pictures so you won't have to suffer my singing LOL!
This week we're making an advent calendar.
You will need:
A scorboard
2 sheets of A4 card
A tag punch or die or something similar
Bookring or ribbon, string, binding tool
Paper to decorate
Numbers of some description
Teddy Bo Image ( if you would like a free image just for joining in :c) )
Cut one of the A4 sheets to 11 inches in length and score at 2, 6 & 10 inches
Flip it over and score at 1 inch
Fold into a tent card but don't secure the bottom as it's easier to decorate if you can lay it flat.
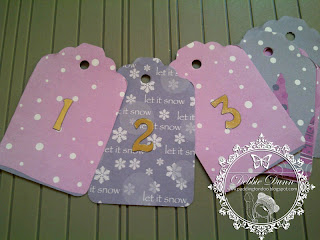
Punch out 24 tags (you can use childrens flash cards, squares, circles or anything you like)
and add your numbers. I've used peel-offs but you could stamp them, die cut them or even write them.
You can either decorate your base now or leave it fairly plain as I have. I've used my crop a dile to punch a hole right through the tags and then through the base card having marked where I wanted the hole to sit. I even remembered to check my bookring would fit. It's not so crucial if you're using ribbon as you can adjust it.
Print your image off and colour and decorate as desired. I've used TeddyBea_161 Santa stop here please and coloured her with Promarkers and added the letters and snow with Sakura gel pens
Here's the assembled advent calendar. I've used part of the 2nd sheet of A4 card to matt Bea onto. Looking at it in the pictures it needs something extra near the numbers but Mr Mojo has done a runner so have walked away for now rather than spoil it - how many time have I done that and not been able to get the offending things off again.....................
PS This fits perfectly with our current challenge which is Christmas with no red or green


9 comments:
Oh! Debbie I love this, what a great tutorial and idea...
Luv CHRISSYxx
Hi this looks fab! Great idea must try this out! Love yours so pretty ! Thanks Kitty :D
oh hun this is stunning,super tutorial too and your coloring is just amazing hugs cheryl xxxx
Oooh very clever. Think I might give this a go. Cheers hun. Jaqui x
Brilliant idea! Love this project, may even give it a go if I can find some time! xx
Brilliant thanks for sharing x
Fabulous x
Lovely - thanks for the tutorial. Refreshing to see different colours for Christmas x
A super tutorial and a brillant idea!
Hugs
Maria
Post a Comment